Migrating from one project management software to another is no small thing for any company wanting to improve its level of collaboration, efficiency, and productivity. This process of migration is very necessary where the system needs to be upgraded, integrated, or even updated to a newer version of the same. But migrating can sometimes go wrong and result in loss of data, lost tasks, disrupted workflow, and most importantly, time and money. It is for this reason that the process is simplified with WeekMate – a great platform for project organizing and managing.
In this guide, you will find out how to migrate your project management software with minimum loss.
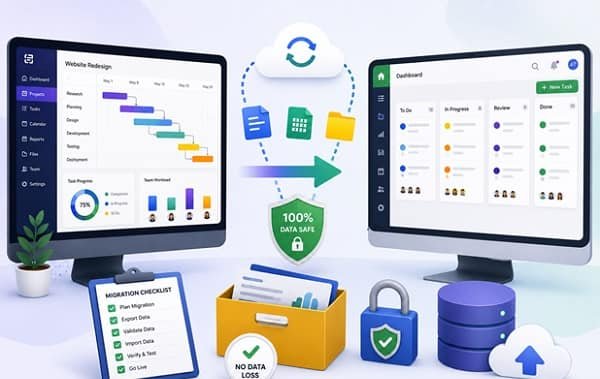
Why Organizations Switch Project Management Software
Organizations change, and the tools used by them to manage projects must also change. There comes a time when organizations need more than what their existing tool can provide for them.
Common Reasons for Migration
1. Outgrowing Current Software
With the increase in size of the team, certain additional functionalities would be required by the team that cannot be provided by the old software.
2. High Subscription Costs
The company will opt for another cheaper but still more efficient system that won’t lack any important features.
3. Limited Integrations
In a modern workplace, there are lots of applications for communications, file sharing, CRM, and accounting. Your software has to be compatible with all those applications.
4. Poor User Experience
Complicated interfaces and difficult workflows reduce team adoption and create unnecessary friction in daily operations.
5. Need for Advanced Features
Many organizations will tend towards migration in order to utilize automation, artificial intelligence-driven insights, personalized processes, time tracking, and improved reporting.
6. Security and Compliance Requirements
The expanding organization may need certain advanced features like security, permissions, encryption, etc.
Signs It’s Time to Upgrade
You may need new project management software if:
- Your team relies on spreadsheets alongside your existing platform.
- Employees avoid using the current system.
- Reporting is difficult or inaccurate.
- Collaboration across departments is inefficient.
- Integrations require manual workarounds.
- System performance slows as projects grow.
- Customer support from your vendor is lacking.
Risks of Switching Project Management Software
Although migration offers long-term benefits, it also presents challenges that should be carefully managed.
Data Loss
Incomplete exports, incompatible file formats, or mapping errors can result in missing tasks, comments, attachments, or project histories.
Downtime and Productivity Issues
If migration takes longer than expected, employees may temporarily lose access to critical project information.
Broken Workflows
Automations, dependencies, recurring tasks, and approval processes may not transfer directly to the new platform.
Missing Attachments and Files
Documents stored in external systems or linked incorrectly can become inaccessible after migration.
Permission and Access Errors
User permission errors could be a potential security threat and deny other project participants access to their needed projects.
User Adoption Challenges
Even the best software needs proper onboarding. If not, teams might face difficulties adjusting to the new setting.
What Data Should Be Migrated?
Before beginning the migration, identify every type of information your team relies on.
Projects and Tasks
Move active, closed, archived, and repeating projects, keeping tasks intact.
Team Members
Import user accounts, roles, and responsibilities to maintain collaboration.
Comments and Activity Logs
Historical discussions provide valuable project context and should be preserved whenever possible.
Files and Attachments
Ensure all supporting documents, images, contracts, and reference materials are included.
Due Dates and Milestones
Maintain schedules to avoid missed deadlines after migration.
Labels, Tags, and Custom Fields
These help categorize work and should be accurately mapped into the new system.
Time Tracking Records
Historical time entries are useful for reporting, billing, and productivity analysis.
Automations and Workflows
Review automated rules carefully, as many platforms require these to be recreated manually.
Preparing for a Successful Migration
Preparation is the foundation of a smooth transition.
Audit Your Existing Data
Review all projects and identify what needs to be migrated.
Remove Duplicate or Outdated Projects
Cleaning unnecessary data reduces migration complexity and improves system performance.
Document Current Workflows
Record how your team manages approvals, recurring tasks, notifications, and reporting.
Identify Essential Integrations
List every connected application that your team depends on.
Create a Migration Timeline
Choose a migration window during periods of lower business activity.
Assign Roles and Responsibilities
Clearly define who will oversee exports, imports, testing, communication, and troubleshooting.
Choosing the Right Project Management Software
Selecting the right platform ensures long-term success.
Must-Have Features
Look for task management, collaboration tools, automation, reporting, calendars, dashboards, and file sharing.
Scalability
Choose software that supports future team growth and increasing project complexity.
Integration Capabilities
Ensure compatibility with communication, CRM, cloud storage, and productivity applications.
Security Standards
Verify encryption, backup policies, user permissions, and compliance certifications.
Ease of Use
An intuitive interface improves adoption and reduces training time.
Pricing Considerations
Evaluate total ownership costs, including subscriptions, implementation, and support.
Customer Support
Reliable onboarding assistance and technical support are essential during migration.
Create a Data Backup Before Migration
Always create multiple backups before making any changes.
Export All Available Data
Download projects, tasks, comments, reports, and user information.
Back Up Attachments
Store files separately in secure cloud storage.
Save User Permissions
Document access levels for every team member.
Verify Backup Integrity
Open exported files and confirm that all information is complete and accessible.
Mapping Your Data
Data mapping ensures information appears correctly in the new platform.
Match Fields Between Platforms
Align task names, due dates, priorities, statuses, and project categories.
Handle Custom Fields
Determine how custom information will transfer or be recreated.
Preserve Relationships Between Tasks
Maintain dependencies and parent-child task structures.
Map Users and Permissions
Assign imported users to the correct teams and projects.
Migration Methods
Different organizations require different migration strategies.
Manual Migration
Suitable for very small teams with limited data.
Pros
- Full control
- Low cost
Cons
- Time-consuming
- Higher risk of human error
CSV Import/Export
Most project management platforms support CSV imports for tasks and projects.
Best for:
Medium-sized datasets.
Limitations:
Attachments and automations often require separate migration.
Native Import Tools
Some platforms provide built-in migration utilities that simplify transfers.
Third-Party Migration Tools
Useful when moving between complex systems with large datasets.
API-Based Migration
Large enterprises often use APIs to automate complex migrations while preserving relationships between data.
Step-by-Step Migration Process
Step 1: Set Up the New Workspace
Configure workspaces, departments, teams, and project templates.
Step 2: Import Users
Invite employees and assign appropriate roles.
Step 3: Import Projects
Transfer project structures before adding tasks.
Step 4: Migrate Tasks and Subtasks
Check hierarchy and dependencies of tasks.
Step 5: Upload Files and Attachments
Make sure the files stay connected to their respective tasks.
Step 6: Rebuild Automations
Reproduce notifications, repeating tasks, and workflow automations.
Step 7: Connect Integrations
Reconnect communication apps, cloud storages, calendars, and other key software.
Step 8: Verify Imported Data
Make sure the records match up in both systems.
Testing Before Going Live
Testing helps identify issues before the entire team begins using the new platform.
Compare Old vs. New Data
Verify project counts, tasks, attachments, and comments.
Test Notifications
Ensure reminders and alerts function correctly.
Verify Automations
Run sample workflows to confirm expected behavior.
Validate Permissions
Confirm users only access authorized projects.
Run Sample Workflows
Test complete project life cycles before launch.
Training Your Team
Successful adoption depends on proper training.
Share User Guides
Provide written documentation and video tutorials.
Conduct Live Training Sessions
Allow employees to practice within the new system.
Address Common Questions
Prepare FAQs and support resources.
Encourage Feedback
Collect suggestions for continuous improvement.
Common Migration Mistakes to Avoid
Avoid these common errors:
- Skipping backups before migration.
- Migrating outdated or unnecessary data.
- Ignoring custom fields and workflows.
- Forgetting third-party integrations.
- Launching without testing.
- Poor communication with stakeholders.
- Migrating during peak business periods.
Best Practices for Zero Data Loss
Perform Multiple Backups
Maintain copies in separate secure locations.
Migrate in Phases
Move one department or project first before full deployment.
Keep Read-Only Access to the Old System
Maintain access until migration is fully verified.
Maintain Version Control
Document every migration step.
Monitor Migration Logs
Review import reports for errors.
Validate Data After Every Phase
Perform quality checks throughout the migration process.
Post-Migration Checklist
After migration, verify that:
- All projects are present.
- Every task has transferred correctly.
- Files open successfully.
- Automations work properly.
- Dashboards display accurate information.
- Integrations function correctly.
- User permissions are accurate.
- Team members can access their work.
- The old platform is archived only after successful verification.
Conclusion
Migration to the new project management tool does not have to be complicated and frightening. If everything is planned thoroughly and with backups taken into account, if the data mapping process is performed accurately and the testing phase is properly conducted and followed by adequate staff training, migrating to the new tool can become a smooth process during which no important information is lost. WeekMate is a tool that allows efficient organization of work and efficient project management.